OS-T: 2000 Design Concept for a Structural C-Clip
In this tutorial you will perform a topology optimization on a model to create a new topology for the structure, removing any unnecessary material. The resulting structure is lighter and satisfies all design constraints.
The topology optimization technique yields a new design and optimal material distribution. Topology optimization allows designers to start with a design that already has the advantage of optimal material distribution and is ready for design fine tuning with shape or size optimization.
- Objective
- Minimize volume fraction.
- Constraints
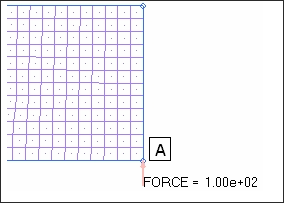
- Translation in the y-axis for node A < 0.07mm.
- Design variables
- The density of each element in the design space.
Launch HyperMesh and Set the OptiStruct User Profile
Open the Model
Set Up the Model
Create the Material
Create the Property
Assign a Material and Property to the comp_shell Component
Apply Loads and Boundary Conditions
Create Load Collectors
Create Constraints
Create Forces
Create Load Steps
Submit the Job
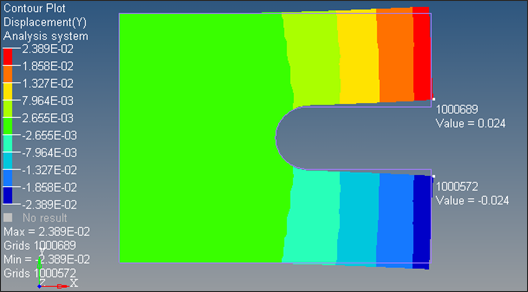
A linear static analysis of this C-clip is performed prior to the definition of the optimization process. An analysis identifies the responses of the structure before optimization to ensure that constraints defined for the optimization are reasonable.
View the Results
Set Up the Optimization
The finite element model, consisting of shell elements, element properties, material properties, and loads and boundary conditions has been defined. Now a topology optimization will be performed with the goal of minimizing the amount of material to be used. Typically, removing the material in an existing volume with the same loads and boundary conditions makes the model less stiff and more prone to deformation. Therefore, you need to track the displacements (which represent the stiffness of the structure) and constrain the optimization process such that the least material necessary is used and overall stiffness is also achieved.
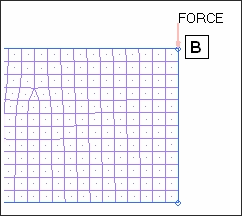
The forces in the structure are applied on the outer nodes of the opening of the clip, making those two nodes critical locations in the mesh where the maximum displacement is likely to occur. In this tutorial, you will apply a displacement constraint on the nodes so that they would not displace more than 0.07 in the y-axis.
Create Topology Design Variables
Create Optimization Responses
Create Constraints on Displacement Responses
- Click the Dconstraints panel.
-
Create the upper bound constraint.
- In the constraint= field, enter c_upper.
- Check the box next to upper bound, then enter 0.07.
- Click response= and select upperdis.
- Using the loadsteps selector, select opposing forces.
- Click create.
-
Create the lower bound constraint.
- In the constraint= field, enter c_lower.
- Check the box next to lower bound, then enter -0.07.
- Click response= and select lowerdis.
- Using the loadsteps selector, select opposing forces.
- Click create.
- Click return to go back to the Optimization panel.
Define the Objective Function
- Click the objective panel.
- Verify that min is selected.
- Click response= and select volfrac.
- Click create.
- Click return twice to exit the Optimization panel.
Create the SCREEN Card
- From the Analysis page, click control cards.
- In the Card Image dialog, click SCREEN.
- Click return.
- Click return.
Run the Optimization
- cclip_complete.hgdata
- HyperGraph file containing data for the objective function, percent constraint violations, and constraint for each iteration.
- cclip_complete.HM.comp.tcl
- HyperMesh command file used to organize elements into components based on their density result values. This file is only used with OptiStruct topology optimization runs.
- cclip_complete.oss
- OSSmooth file with a default density threshold of 0.3. You may edit the parameters in the file to obtain the desired results.
- cclip_complete.out
- OptiStruct output file containing specific information on the file setup, the setup of the optimization problem, estimates for the amount of RAM and disk space required for the run, information for all optimization iterations, and compute time information. Review this file for warnings and errors that are flagged from processing the cclip_complete.fem file.
- cclip_complete.res
- HyperMesh binary results file.
- cclip_complete.sh
- Shape file for the final iteration. It contains the material density, void size parameters and void orientation angle for each element in the analysis. This file may be used to restart a run.
- cclip_complete.stat
- Contains information about the CPU time used for the complete run and also the break-up of the CPU time for reading the input deck, assembly, analysis, convergence, and so on.
- cclip_complete_hist.mvw
- Contains the iteration history of the objective, constraints, and the design variables. It can be used to plot curves in HyperGraph, HyperView, and MotionView.
- cclip_complete.h3d
- HyperView binary results file.
View the Results
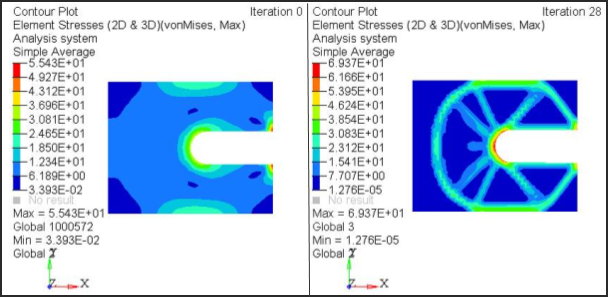
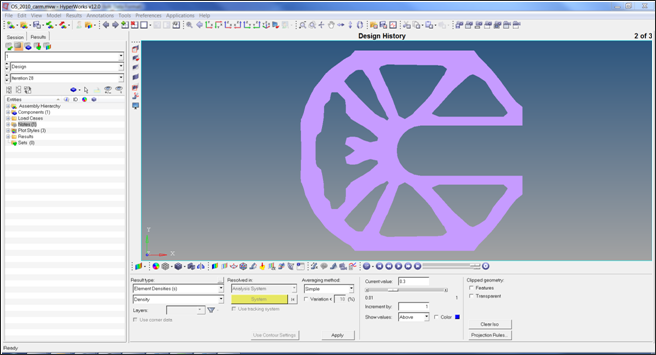
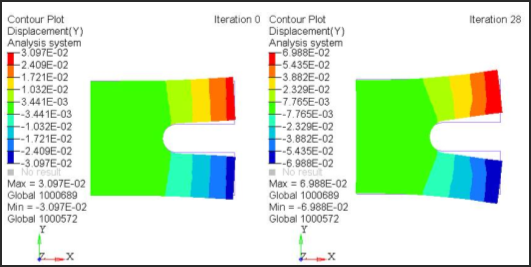
Element density results are output to the cclip_complete_des.h3d file from OptiStruct for all iterations. In addition, Displacement and Stress results are output for each subcase for the first and last iterations by default into cclip_complete_s#.h3d files, where # specifies the sub case ID.


 to open the


 to go to
page 3.
 to divide the page into two vertical windows.
 to open the Deformed panel.
 .
.
 to open the