Contour Measure Curves
The Contour Measure Curves dialog allows you to quickly plot contour measure curves.

-
From the toolbar, select Tools > Contour Measure Curve.
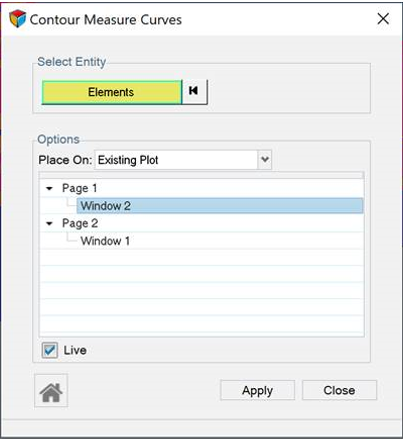
The Contour Measure Curves dialog is displayed.Note:
- A contour result must be loaded in the active window to allow the tool to start.
- Overlaid models are not supported, a message will be displayed.
- Ensight models with active section cuts and system based results are not supported.
Figure 2.
-
Select entities from the modeling window. The entity selector shows the entity
type binding from the loaded contour results (Nodes, Elements,
Components).
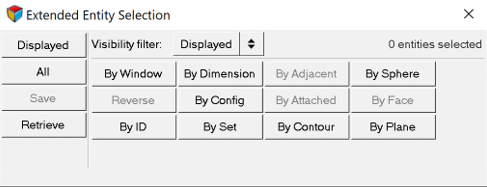
Note: Click the Nodes/Elements/Components button on the input collector to access the extended selection menu.Figure 3.

-
Under Options, use the Place On drop-down menu to select
a destination for the curve.
Option Description Preview plot Allows you to review curves in a preview window. New plot A new page is added containing one plot window where the curve(s) are created. Note: Per default, the layout of the current page will not be changed.Existing plot The curve is created in an existing plot window that was selected from the page and window tree. - Optional:
Activate the Live check box to establish a link between
the entity selections on the contour and the curve.
Note: (Live) will be added to the name of the measure item and the curve name to indicate that a live link is established.
-
Click the Apply button to create a curve in a HyperGraph window.
- If New plot was selected - a new page with one HyperGraph plot window is created in a HyperGraph.
- If Existing plot was selected – curves are added to the existing plot in HyperGraph (which was selected in the session tree).
Note: A new plot is also created in the HyperView Measure panel and Results Browser. -
After plotting the measure curves, the Home Button
 in the lower left corner of the dialog becomes
active. This button allows you to quickly make the page and HyperView window active where the curves are originated
from and plot additional curves.