Patch and Delete Surfaces

Use the Surfaces: Patch tool to create patch surfaces between free lines that are not connected or surface edges. You can also delete surfaces with this tool.
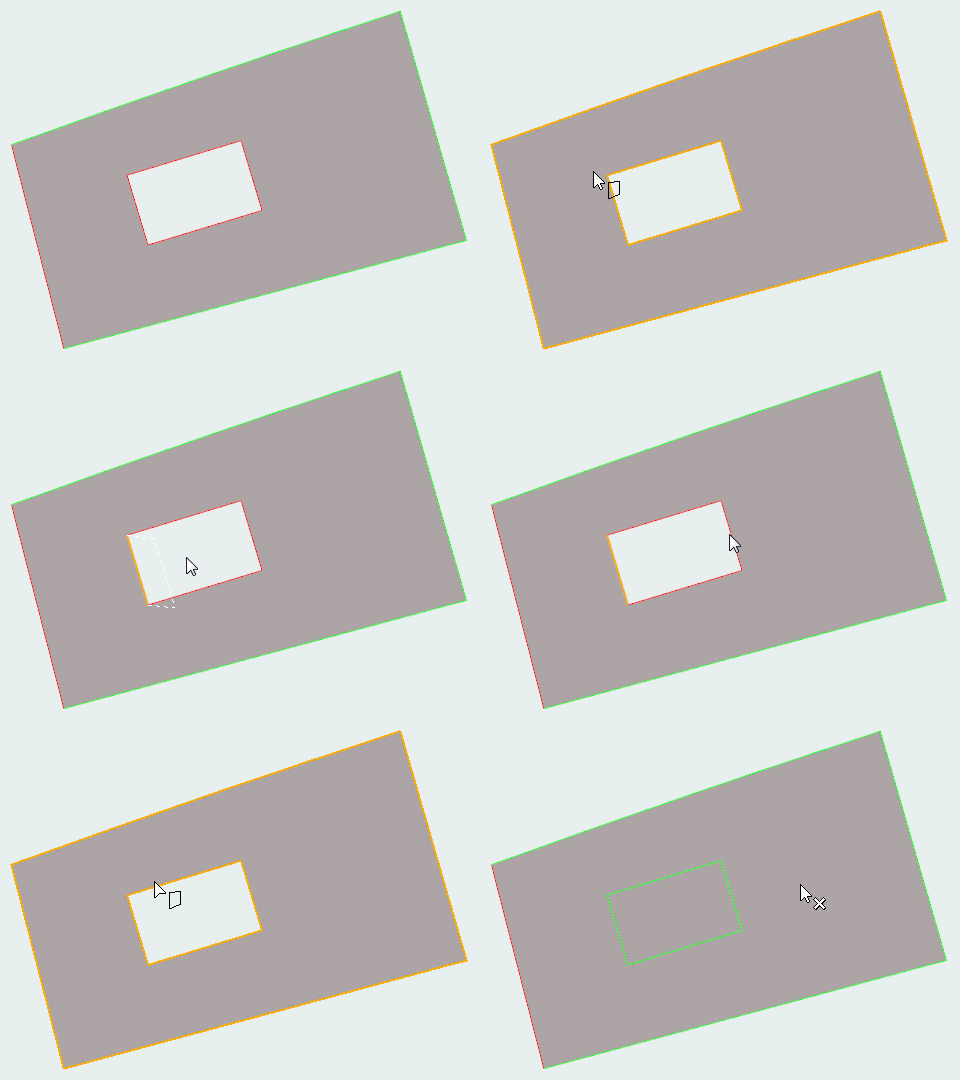
New surfaces are organized in the same component as the first line selected.
  1. From the Geometry ribbon, click the Surfaces > Patch tool.


    Figure 1.
  2. To manually patch surfaces, do one of the following:
    • While left-clicking, drag an edge to another edge.

      Hovering over a target line displays a preview surface.

    • Select multiple edges around a missing surface, then click an edge that has already been selected.
    • Select multiple edges or loops, then click Patch All on the guide bar.
    • Double-click an edge loop.
    Tip: After a patch surface has been manually created, it remains selected. HyperWorks attempts to select the appropriate tangency setting for the surface created, but you can change the tangency by clicking on the surface while it is still selected.
  3. To automatically highlight and patch missing surfaces:
    1. Click Find on the guide bar.
    2. Click and to cycle through found surfaces.
    3. Select highlighted surfaces to fix them individually or click Patch All on the guide bar.
  4. To delete surfaces:
    1. Select the surface(s) you want to delete.
    2. Click the highlighted surface(s) again to delete them.


Tip: Copying and pasting solid faces generates surfaces and organizes them in the same component.

Surfaces: Patch Tool

An overview of the Surfaces: Patch tool.


Figure 2.

Use the Surfaces: Patch tool to create patch surfaces between free lines that are not connected or surface edges. You can also delete surfaces with this tool.

Access
Go to Geometry > Surfaces > Patch.

Keyboard Shortcuts and Mouse Controls

To do this Press
Drag/select lines Left Mouse Click
Patch a surface hole Double-Click