Model Browser
The Model Browser is a central part of HyperWorks that allows you to get an overview, edit, and control the display of all contents of a model
To open the Model Browser, click from the menu bar.
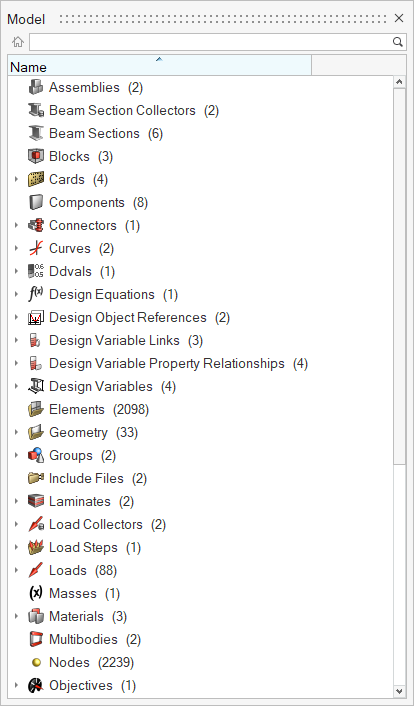
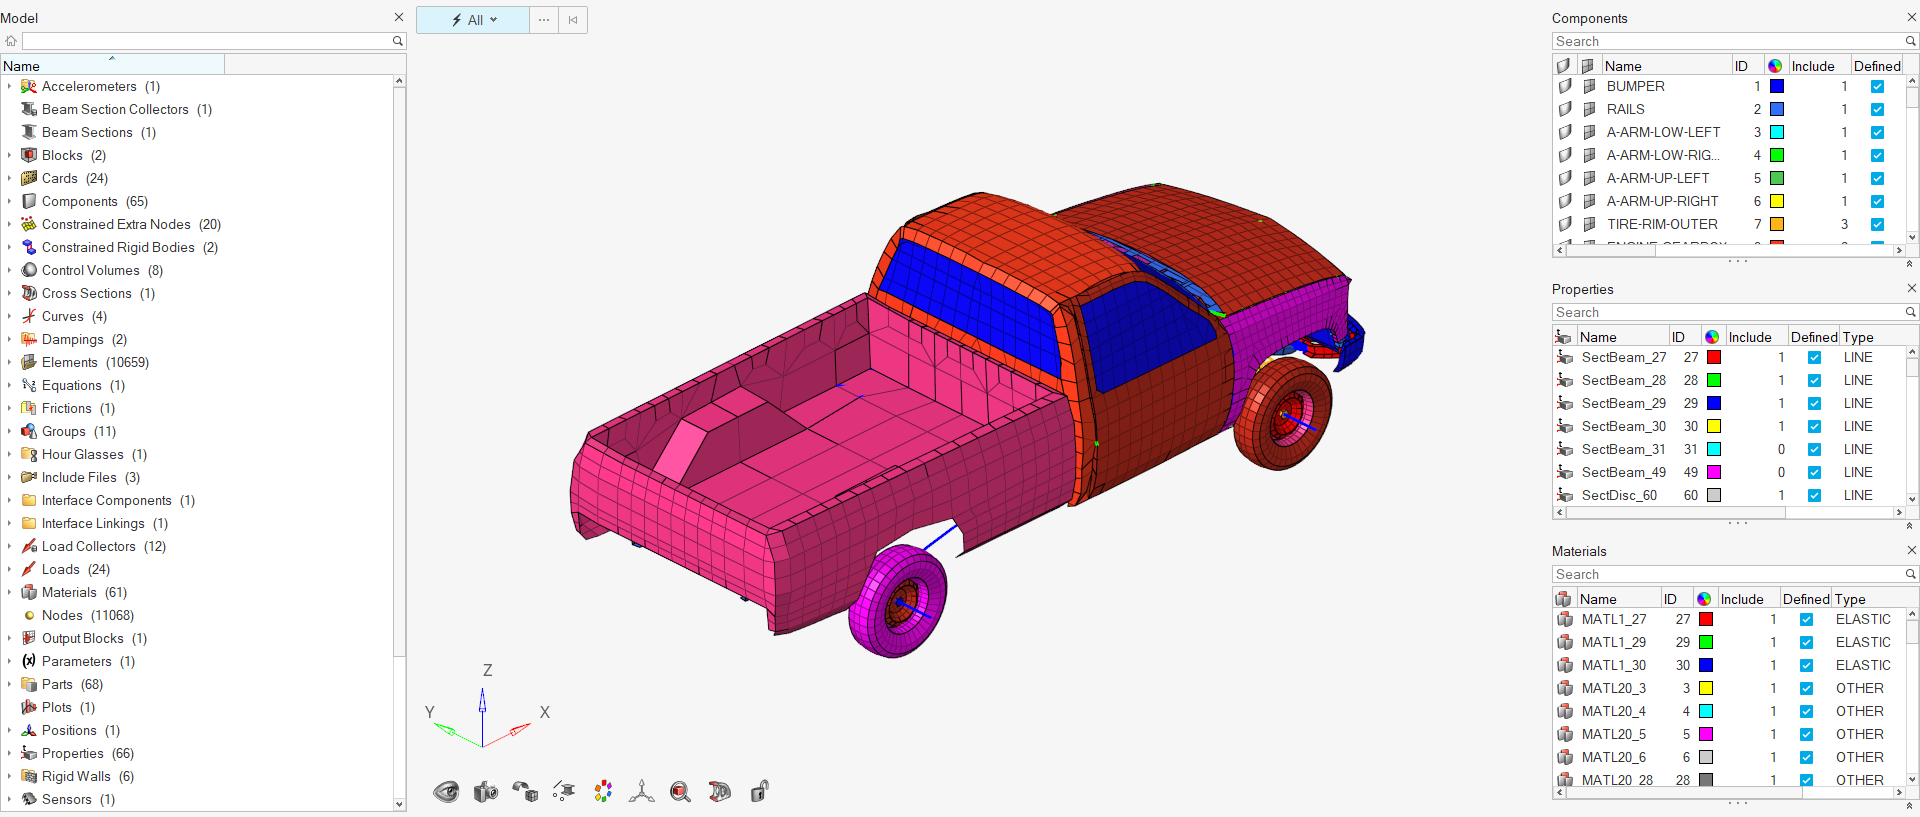
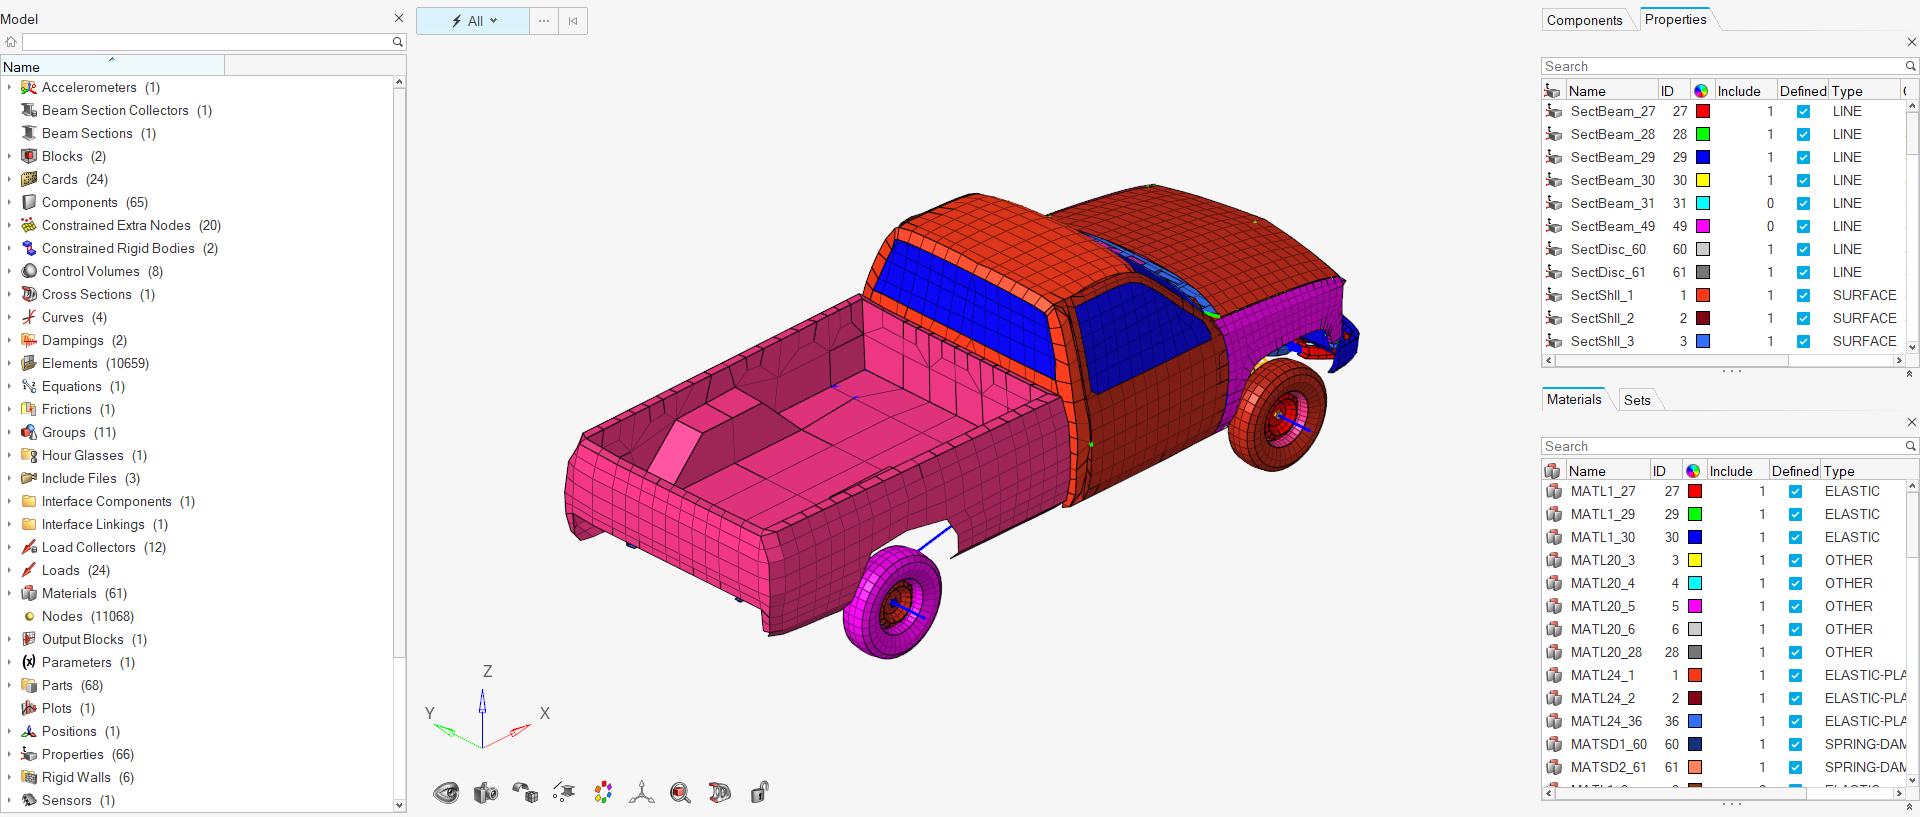
The Model Browser shows all the contents of a model present in the session. Entities such as nodes, elements, connectors, geometry, loads, and subsystems are now displayed, along with other entities such as components, properties, materials, and so on.
Additional categories for undefined and ungrouped entities are listed under each entity folder when applicable. The ‘Undefined’ folder contains all entities that a solver deck refers to but are not present in the model. The ‘Ungrouped’ folder contains all entities that are without a solver card.
To return to the Model content view from the Include
view, click ![]() .
.
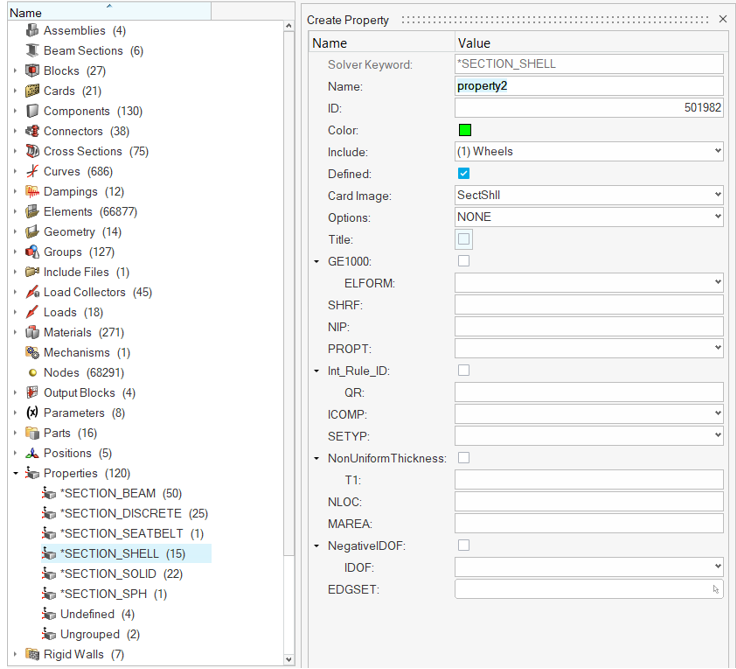
Right-click in the browser white space to create any entity – for example, a Property. Right-click on an entity grouping to create a specific type of entity – for example, a Property of type SECTION_SHELL.
Open Entity Views in the Model Browser
Quickly display all entities of a specific type in the Model Browser.
-
In the Model Browser, double-click on an entity group
to open its respective entity view.
All entity views, except for the Include view, can be docked to the right or bottom docking areas, or undocked to float.Figure 5.
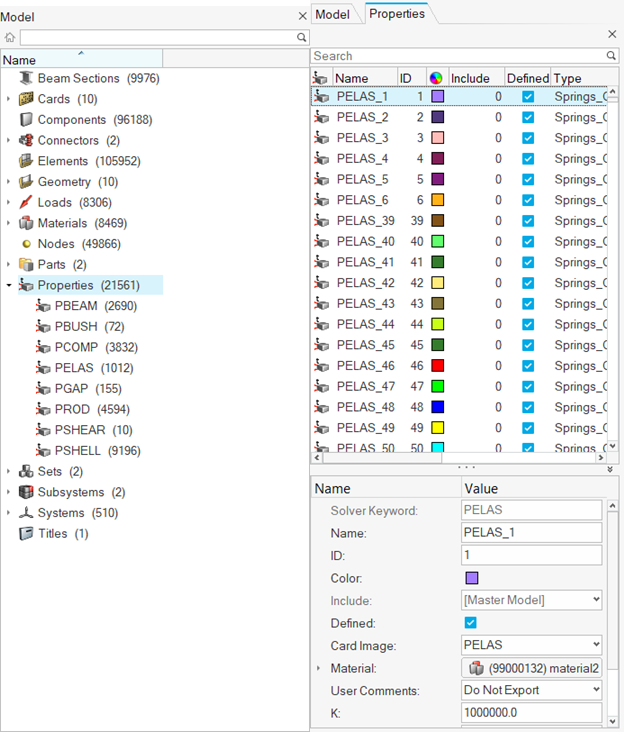
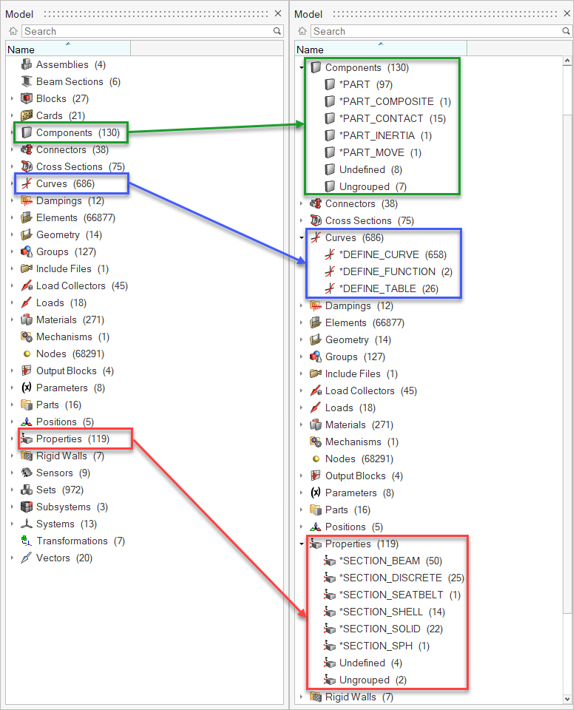
Double-clicking on a first-level entity grouping invokes an entity view displaying all entities of the selected type. In the entity views, append entity attributes, including those which are referenced, as columns and use column filters for fast and efficient review, editing, sorting, and filtering.
Double-clicking on a second-level entity grouping invokes a filtered entity view displaying just the entities of the selected sub-type. Here, you can review and edit the entities of interest.Figure 6.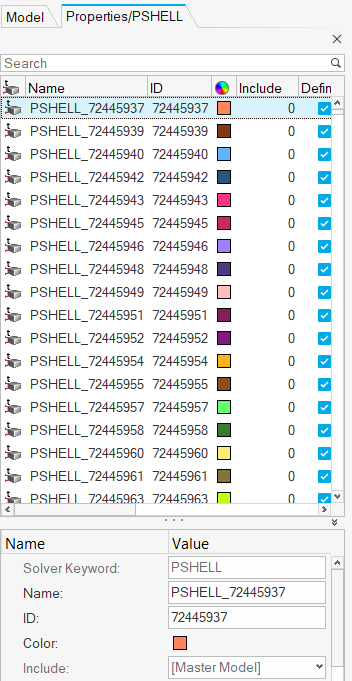
The color of geometry and mesh in the modeling window will be changed if the entity type selected has a corresponding color mode.
-
To close entity views, click
 .
.
-
To return to the Model content view from the Include view, click
 .
.
Add Attributes to Entity Views
Append attributes to the browser as columns to facilitate fast and efficient review, editing, sorting, and filtering in an entity view.
-
Append attributes as columns in the following ways:
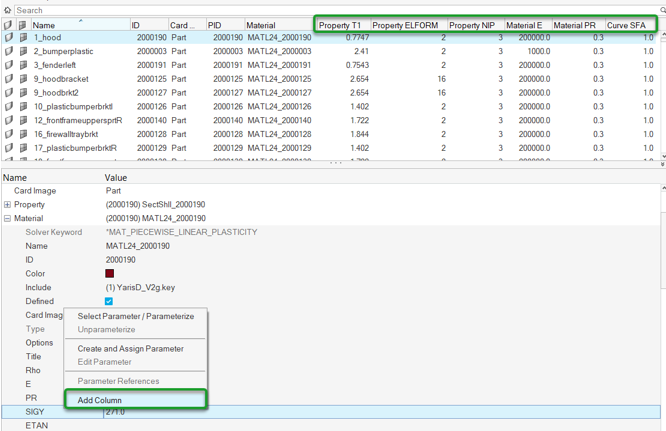
- Right-click on a column heading and select More from the context menu to access a list of all entity attributes that can be appended to the browser.
- From the Entity Editor, right-click on an
attribute and select Add Column from the context
menu. Referenced entities can only be added from the Entity Editor.Figure 7.
Dock and Undock Entity Views
Entity views can be undocked to float or docked to the left, right, or bottom docking areas.

Configuration Options
Configure the display and behavior of the Model Browser.
Local Options
Open the Browser Configuration dialog by right-clicking in the Model Browser and selecting Configure Browser from the context menu.
- Delete association
- Open the Delete component(s) and unique associations dialog when Delete Advanced is selected from the context menu. When this box is checked off, the Delete component(s) and unique associations dialog does not open when Delete Advanced is selected from the context menu, and the entities uniquely related to the selected component are automatically deleted.
- Hide attached
- Mask the attached elements in the modeling window when you hide the following entities: loads, load collectors, load steps, groups and contact surfaces. This can be observed if the elements are currently displayed. This will not change the display state to off; thus, that the local display icon will not be dimmed.
- Show/hide/isolate Include files with References
- Show, hide, isolate the contents of an Include file when you Show/Hide/Isolate the Include file. If you turn this option off, Show/Hide/Isolate will only affect the components and other HM entities that have graphics (vectors, systems, plies, laminates, loads) in the Model Browser, Solver Browser, and ID Manger Include files.
- Show/Isolate/Isolate Only attached
- View the attached elements in the modeling window when you Show/Isolate/Isolate Only the following entities: loads, load collectors, load steps, groups and contact surfaces. This can be observed if the elements are currently masked or the display state of the component's elements is turned off. This will also turn on the local display icon.
- Save view with mask
- If off, only the on/off state of the collectors are saved. The mask state of individual entities is ignored.
Entities Tab
To select entity types to display in the browser, activate the checkboxes next to each desired entity type. A check mark indicates that the entity type will display in the browser. Use the Show Existing button to list only the entities that are present in the model. Turning off this button shows all the entities even when they are not present in the model. You can also use the select all, select none, and select reverse buttons in this mode.
Model Browser Preference
The previous version of the Model Browser can be accessed by changing the Model browser organization option from .
- Grouped views – Organizes entities by type and sub-type. Double-click to interact with entities in entity views.
- Flat list (legacy) – Organizes entities by type and shows a flat list of entities.